How to Create a Data Entry Form in Excel
TLDRThis video tutorial demonstrates how to create a data entry form in Excel using VBA. It showcases a step-by-step process to build an application that enables users to add, edit, and delete records efficiently. The form includes a list box, buttons for various actions, and text boxes for data input. The video also explains how to link the form to an Excel worksheet, handle data validation, and use shortcuts for easy access. The source code for the application is made available for download.
Takeaways
- 📝 Create a data entry form in Excel using VBA to manage records efficiently.
- 🔄 The form allows for adding, deleting, and editing of records with ease.
- 🎥 Download the source code provided in the video description to follow along.
- 📋 The user form is customized with a modern color scheme and clear fonts for better readability.
- 🔲 A list box is used to display all data items, which can be interacted with to perform actions.
- 🔴 Buttons are styled with accelerator keys for快捷 access and functionality.
- 🔄 The 'New' button opens a form to input details for a new user, generating a unique ID automatically.
- ✂️ The 'Delete' button removes a selected item from the list and updates the worksheet accordingly.
- 🔄 The 'Edit' function allows changes to be made to existing records, with the updated data reflecting in the list box.
- 📊 Data from the worksheet is dynamically loaded into the list box upon form initialization.
- 🛠️ VBA code is organized into modules for better separation of concerns and maintainability.
- 🎯 Use of message boxes and user confirmations for critical actions like saving and deleting records.
Q & A
What is the main purpose of the application built in the video?
-The main purpose of the application is to create a data entry form using Excel VBA, which allows users to add, delete, and edit records efficiently.
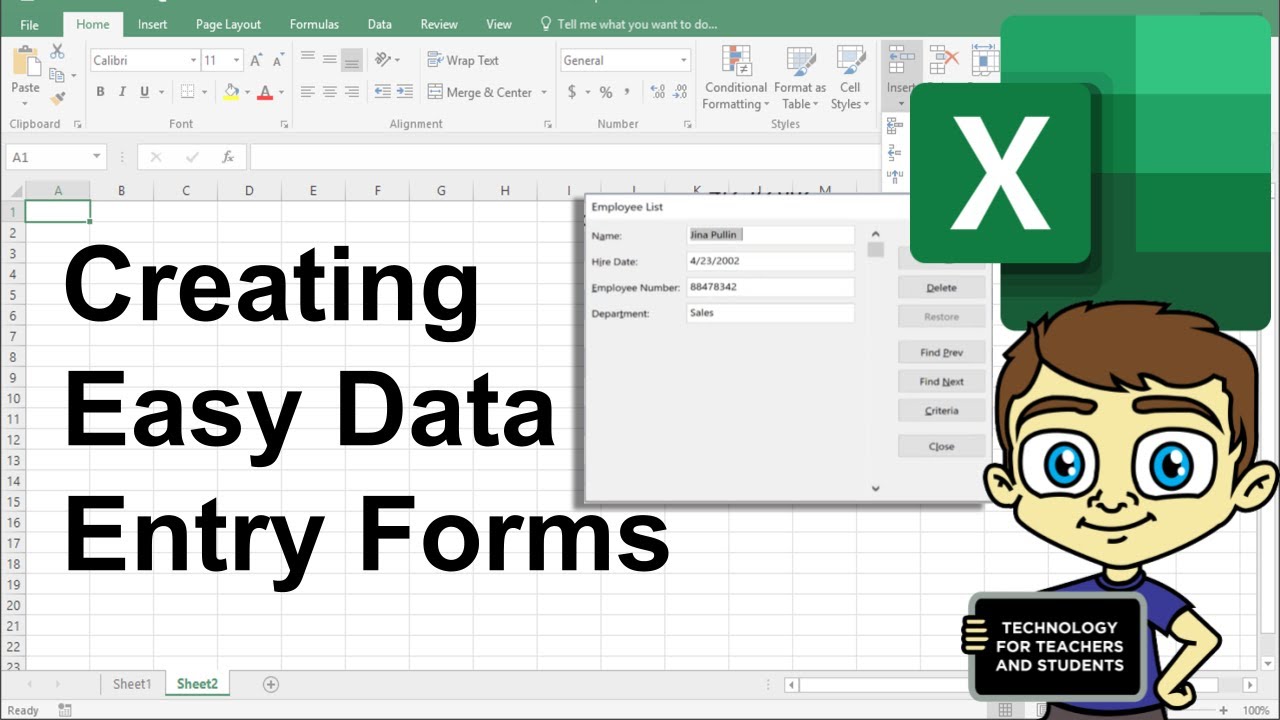
How does the data entry form application look like initially?
-Initially, the data entry form application consists of a user form with a list box displaying all the data items. It also includes buttons for new, edit, and delete operations.
What are the steps to add a new record in the data entry form?
-To add a new record, click on the 'New' button to bring up an empty form, input the data for the new user, and click 'Save' to save the new entry to the worksheet and list box.
How can an existing record be edited in the data entry form?
-To edit an existing record, select the item in the list box, click 'Edit', make the necessary changes, and then click 'Save' to update the record on the worksheet and list box.
What happens when the 'Delete' button is clicked in the data entry form?
-When the 'Delete' button is clicked, the selected item is removed from both the list box and the original data on the worksheet.
How is the user form for the data entry form application customized?
-The user form is customized by setting the background color, naming the form, adjusting the height and width, and adding a list box and buttons for various functions like new, edit, and delete.
What is the role of the list box in the data entry form application?
-The list box in the data entry form displays all the data items. It is populated with data from the worksheet and updates automatically when new items are added, edited, or deleted.
How can users interact with the data entry form application?
-Users can interact with the data entry form application by using the provided buttons to add, edit, or delete records, and by entering data through the form controls when adding or editing a record.
What is the significance of the 'Initialize' event in the user form?
-The 'Initialize' event is significant because it is where the user form is filled with data. It runs only once when the form is created, making it the perfect place to load data into the form's controls.
How does the video script guide users to handle the worksheet data?
-The video script guides users to handle worksheet data by demonstrating how to link the list box to the worksheet data using row source, and how to write, read, and delete data from the worksheet through VBA code.
What is the purpose of creating a separate module for range code?
-Creating a separate module for range code helps to keep the user form code clean and flexible. It allows for easy changes to the range code without affecting the user form code, and vice versa.
Outlines
📝 Introduction to Excel VBA Data Entry Form
The video begins with an introduction to creating a data entry form using Excel VBA. The presenter explains that the form will enable users to add, delete, and edit records. They encourage viewers to download the source code and engage with the video by liking and subscribing. The application being built is showcased, demonstrating how data items are added to a list box and how new data can be entered for a user. The video also explains the process of saving new entries and how the form updates the worksheet automatically.
🎨 Customizing the User Form and List Box
This paragraph details the customization of the user form's appearance and functionality. The presenter guides through setting the background color, naming the form for clarity, and adjusting the form's dimensions. They also explain how to add a list box to display data, set its font size, and position it within the form. The paragraph emphasizes the importance of organizing and documenting the settings for reproducibility and ease of use.
🔘 Adding Buttons and Setting Properties
The focus of this paragraph is on adding buttons to the user form and configuring their properties. The presenter describes the process of naming the buttons, setting accelerator keys for快捷方式, and styling the buttons to match the form's aesthetic. They also discuss the functionality of each button, such as 'New', 'Edit', 'Delete', and 'Close', and how to set their positions and dimensions. The paragraph highlights the use of the 'Cancel' property to close the form using the Escape key.
🔄 Initializing and Populating the User Form
This paragraph explains the initialization of the user form and the process of populating the list box with data. The presenter demonstrates how to write a separate subroutine to fill the user form with data from the worksheet, emphasizing the flexibility and maintainability of separating range code from user form code. They also show how to use the 'Row Source' property to link the list box to the data on the worksheet, ensuring that changes in the data are reflected in the list box.
🗑️ Implementing the Delete Button Functionality
The paragraph focuses on the implementation of the delete button's functionality within the data entry form. The presenter outlines the process of creating a 'Delete Row' subroutine in the 'modRange' module, which deletes the selected row based on the list index. They explain the use of 'Range', 'Offset', and 'Entire Row' methods to identify and remove the correct row from the worksheet, ensuring that the list box is updated accordingly.
📝 Creating a New Staff Member Form
This section details the creation of a new user form for entering details of a new staff member. The presenter guides through duplicating an existing form, customizing it with a new caption and background color, and adding necessary controls such as text boxes and labels. They also discuss the addition of radio buttons for gender selection and the importance of consistent naming conventions for ease of coding and maintenance.
🔄 Loading and Displaying Data in Combo Boxes
The paragraph explains the process of loading data into combo boxes using VBA. The presenter demonstrates how to create functions to retrieve data from specific tables in the worksheet and load this data into the combo boxes. They also show how to set the 'List Index' property to select the first item in the combo box by default. The focus is on efficiently populating the combo boxes with department and country data for selection by the user.
✅ Saving New Staff Member Data
This paragraph covers the process of saving new staff member data to the worksheet. The presenter explains how to use a message box to confirm the user's action before saving. They detail the steps to write data to the worksheet, reset the controls, and generate a new user ID. The code is written to handle text boxes, combo boxes, and option buttons, ensuring that all user inputs are correctly saved and the form is updated accordingly.
🔄 Testing the Data Entry Form
The presenter tests the data entry form by adding new staff members and saving the data to the worksheet. They demonstrate the functionality of the 'New' button, which launches the form with a pre-filled ID and populated combo boxes. The form's ability to save data and update the list box is verified by adding a few entries and checking the results on the worksheet. The presenter emphasizes the importance of testing, especially with the first and last items, to ensure that the form works correctly.
📝 Editing Existing Staff Member Details
This section focuses on editing existing staff member details using the data entry form. The presenter explains how to load the 'Edit Staff Member' form with the selected staff member's data and how to pass the current role from the list box to the form. They detail the process of reading data from the worksheet and populating the form's controls, ensuring that the correct information is displayed for editing.
🔄 Updating Staff Member Records
The paragraph describes the process of updating staff member records in the worksheet. The presenter outlines the steps to write data back to the worksheet when changes are made in the 'Edit Staff Member' form. They explain the use of a message box to confirm the update and the code required to write the updated data to the correct row in the worksheet. The paragraph also highlights the automatic toggling of the 'Full Time' and 'Part Time' option buttons based on user selection.
🎉 Completing the Data Entry Application
The video concludes with a demonstration of the fully functional data entry application. The presenter showcases the 'New', 'Edit', and 'Delete' functionalities, emphasizing their seamless integration and smooth operation. They invite viewers to download the fully working version of the application and provide feedback or suggestions for future content. The presenter also encourages viewer engagement through likes, subscriptions, and comments.
Mindmap
Keywords
💡Excel
💡VBA
💡Data Entry Form
💡UserForm
💡ListBox
💡Buttons
💡Source Code
💡Worksheet
💡Controls
💡Macros
Highlights
The video demonstrates how to create a data entry form in Excel using VBA, enabling users to add, delete, and edit records.
The source code for the video is available for download in the description below the video.
The application built in the video allows for data items to be displayed in a list box, with the ability to interact with them through a user form.
New data can be added for a new user through an empty form that appears when the 'New' button is clicked.
Saved data is reflected on the worksheet and the original list of items, showing the changes made through the form.
The 'Edit' function allows users to select an item, make changes, and update the record directly from the form.
The 'Delete' function removes a selected item from the list and also deletes it from the original data source.
The user form is customizable, with settings for color, name, and size to improve the user experience.
Buttons on the form are designed with specific functions, such as 'New', 'Save', 'Edit', 'Delete', and 'Close', each with its own event code.
The video provides a step-by-step guide on setting up the user form, including adding a list box and configuring buttons.
The video explains how to create a shortcut key (Ctrl+Q) for easy access to the data entry form.
The 'Initialize' event is used to fill the user form with data from the worksheet.
The video details the process of linking data from the worksheet to the list box using row source and external references.
The 'Delete Row' subroutine is explained, demonstrating how to delete a selected row from the data source.
The video shows how to create a new user form for adding new staff members, including setting up text boxes and labels.
Duplicating a user form is discussed, with a focus on using two different forms for 'New' and 'Edit' functions due to differing code requirements.
The process of creating a new user ID for each record and initializing controls is outlined.
The video concludes by showing a fully functional data entry application with 'New', 'Edit', and 'Delete' functionalities.
Transcripts
Browse More Related Video

SUPER EASY Excel Data Entry Form (NO VBA)

Fully Automated Data Entry User Form in Excel - Step By Step Tutorial
Create Excel Database and Data Entry Form. Excel Magic Trick 1690.
Creating Easy Data Entry Forms in Excel

How To Create An Excel Data Entry Form WITHOUT A UserForm

Data Analysis Using Excel Analysis ToolPak - Statistical tools and Methods in Practical Research
5.0 / 5 (0 votes)
Thanks for rating: