Solving Linear Equations Using the TI 83 or TI 84 Series Calculator
TLDRThis instructional video demonstrates how to solve linear equations using a TI-83 Plus or TI-84 series calculator. The presenter guides viewers through the process of entering equations into the calculator's graphing mode, setting up the graphing window, and using the 'intersect' function to find the solution. The example given involves a complex linear equation, but the method is applicable to simpler ones as well. The video also explains how to clear equations, zoom in and out on the graph, and verify the solution by substituting the found value back into the original equation.
Takeaways
- 📚 The video tutorial demonstrates how to use a TI-83 Plus or TI-84 series calculator to solve linear equations.
- 🔍 The equations can range from simple, like 2x = 5, to more complex ones, such as those shown in purple in the video.
- 📝 Handwritten instructions are available and can be found via a link in the video description on YouTube.
- 💡 The instructions are applicable to any linear equation, with the user needing to replace the example equation with their own.
- 🛠️ The process begins by turning on the calculator and entering the graphing mode by pressing the 'y=' button.
- ✍️ To clear an existing equation, use the up and down arrows to navigate and the Clear button.
- 📈 The video explains how to enter the left side of the equation into 'y1' and the right side into 'y2'.
- 🔢 The calculator differentiates between the negative key and the minus operation, so it's important to be aware of which one is used.
- 🖼️ The graphing window is set up using the Zoom function, with the 'Zoom Standard' option used to graph the equations in a standard window.
- 🔎 The intersection point of the two lines on the graph represents the solution to the equation, and the calculator can be used to find this point.
- 📊 To find the intersection point, the calculator's 'intersect' function is used after navigating through the 'Calculate' menu.
- 🔚 The solution for 'x' is found at the intersection point, and the video concludes with testing the solution by substituting 'x' back into the original equation.
Q & A
What is the main purpose of the video?
-The main purpose of the video is to demonstrate how to use a TI-83 Plus or TI-84 series calculator to solve linear equations by utilizing its graphing capabilities.
What types of linear equations can be solved using the method shown in the video?
-The method can be used to solve simple linear equations like '2x = 5' or 'x + 10 = 20', as well as more complex equations, such as the one in purple mentioned in the video.
How can one access handwritten instructions for the process shown in the video?
-Handwritten instructions can be found by checking the description in the YouTube video box where a link to the instructions is provided.
What is the first step to enter the graphing mode on the calculator?
-The first step to enter the graphing mode is to press the 'y=' button, located just on the left side of the calculator under the screen.
How do you clear an unwanted equation from the calculator's screen?
-To clear an unwanted equation, use the up and down arrows to scroll down to the equation and press the Clear button.
Why is it important to ensure that the equal sign is not highlighted after clearing an equation?
-The equal sign being highlighted indicates that the equation is active and will be graphed. Ensuring it is not highlighted prevents the cleared equation from being graphed unintentionally.
What is the significance of selecting 'y1' and 'y2' for graphing the equations?
-Selecting 'y1' and 'y2' is a method to keep the process simple and organized. It allows the user to input the left side of the equation into 'y1' and the right side into 'y2' for graphing.
How does the calculator differentiate between the negative key and the minus operation in equations?
-The calculator knows the difference between negative and minus operations. If a short dash appears, it indicates that the negative key was pressed by mistake.
What is the 'Zoom Standard' function used for in the context of the video?
-The 'Zoom Standard' function is used to set a standard graphing window for viewing the graph of the equations, making it easier to find the intersection point.
What is the 'intersect' command used for in the calculator?
-The 'intersect' command is used to find the intersection point between two equations (or curves), which is the solution to the linear equation being solved.
How does the calculator handle equations that intersect at multiple points?
-If an equation intersects at multiple points, the calculator may require a guess close to one of those points to determine which intersection to calculate.
What is the final step to verify the solution found using the calculator?
-The final step is to plug the found solution (x = 14.5 in the example) back into the original equation to ensure that both sides of the equation are equal, confirming the correctness of the solution.
Outlines
📚 Introduction to Solving Linear Equations on TI-83/84 Calculators
This paragraph introduces a tutorial video on how to use a TI-83 Plus or TI-84 series calculator to solve linear equations. The video will focus on the graphing capabilities of the calculator to solve equations, starting with simple ones like '2x = 5' and progressing to more complex ones, exemplified by a purple equation. The presenter offers a link to handwritten instructions in the video description for those who prefer a visual guide. The instructions are applicable to any linear equation, with the reminder to replace the example equation with the user's own. The video then proceeds to guide the user through turning on the calculator, entering graphing mode, clearing previous equations, and setting up the calculator for the demonstration.
📈 Demonstrating Graphing Mode and Equation Entry on Calculator
The second paragraph details the process of entering equations into the calculator's graphing mode. The presenter explains how to clear unwanted equations and enter a new one, using 'y1' and 'y2' for simplicity. The left side of the chosen equation, '2x + 3', is entered into 'y1', utilizing the calculator's variable button (X T theta n) to denote the variable 'x'. The right side of the equation, '4(x - 6) - 2', is then entered into 'y2'. The presenter emphasizes the importance of using the correct keys for operations and negative values. After entering the equations, the video explains how to set up the graphing window using standard settings to ensure the lines can be graphed and their intersection point, which represents the solution to the equation, can be found.
🔍 Finding the Intersection Point and Solving the Equation
The final paragraph describes the steps to find the intersection point of the two lines graphed on the calculator, which is the solution to the linear equation. The presenter explains how to zoom out to capture the intersection point that may not be visible at the initial graphing window setting. After zooming out and centering the zoom feature, the intersection point is identified on the graph. The presenter then guides the user on how to use the calculator's 'intersect' function to find the exact coordinates of the intersection point. The function prompts the user to select the two curves (in this case, lines represented by 'y1' and 'y2') and provides a guess to find the intersection. The calculator calculates the intersection point, giving the value for 'x' as 14.5. The presenter concludes by suggesting to plug this value back into the original equation to verify the solution, ensuring that both sides of the equation equal each other, which confirms the correctness of the solution.
Mindmap
Keywords
💡TI-83 Plus
💡TI-84 Series
💡Linear Equations
💡Graphing Mode
💡Y1 and Y2
💡Variable Button (X T^θn)
💡Zoom Standard
💡Intersection Point
💡Calculator Functions
💡Testing the Solution
Highlights
Introduction to using a TI-83 Plus or TI-84 series calculator to solve linear equations.
Explanation of simple linear equations like 2x=5 and more complex ones.
Availability of handwritten instructions linked in the video description.
Guidance on turning on the calculator and entering graphing mode.
How to clear unwanted equations and deactivate the equal sign for graphing.
Using y1 and y2 for simplicity in graphing linear equations.
Entering the left side of the equation into y1 on the calculator.
Instructions on using the variable button (X T theta n) for equations.
Entering the right side of the equation into y2, including parentheses and negative signs.
Setting up the graphing window with a standard zoom for clarity.
Zooming out to find the intersection point of the graphed lines.
Using the zoom feature to center and expand the view for better visibility of the intersection.
Activating the intersect function to calculate the intersection point.
Navigating the calculator's menu to find and use the intersect option.
Providing a guess for the calculator to find the exact intersection point.
Calculating the intersection point and verifying the solution.
Testing the solution by plugging the value back into the original equation.
Conclusion on how to use the calculator to solve linear equations effectively.
Transcripts
Browse More Related Video
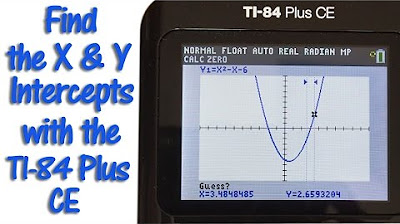
TI 84 Plus CE Calculator Find the X and Y Intercepts
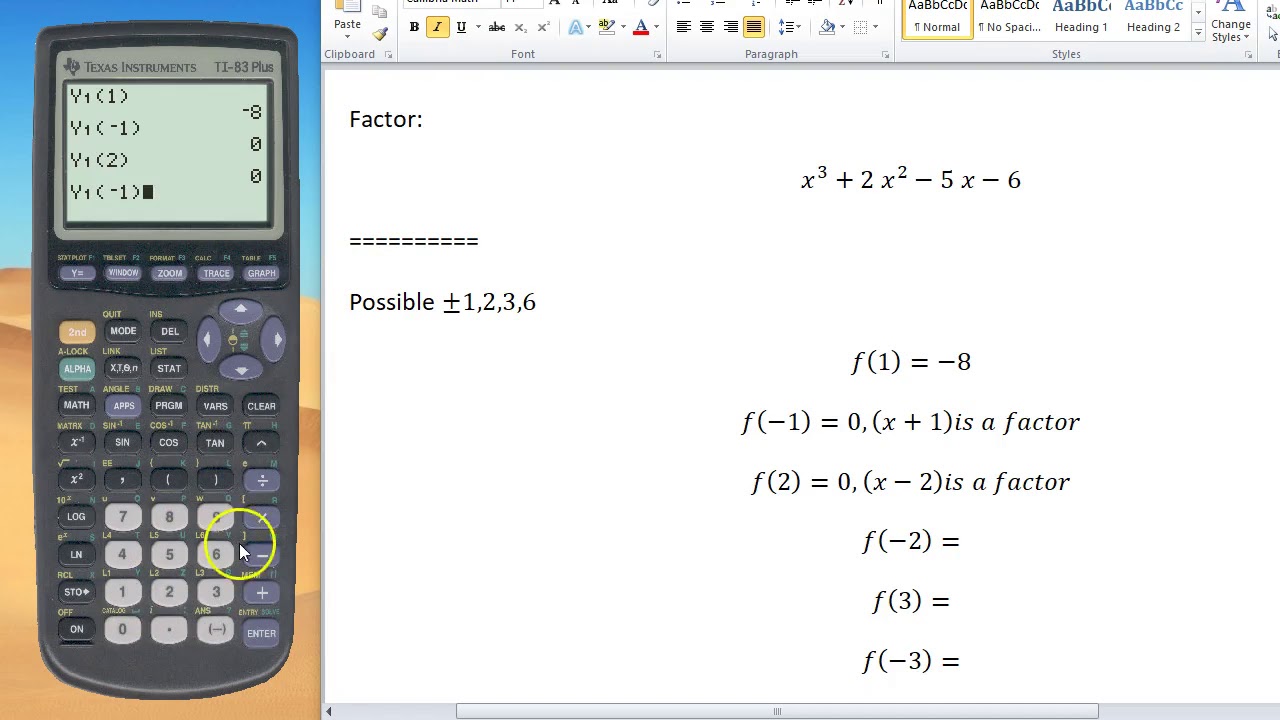
How to Factor w/ TI 83/84 Graphing Calculator
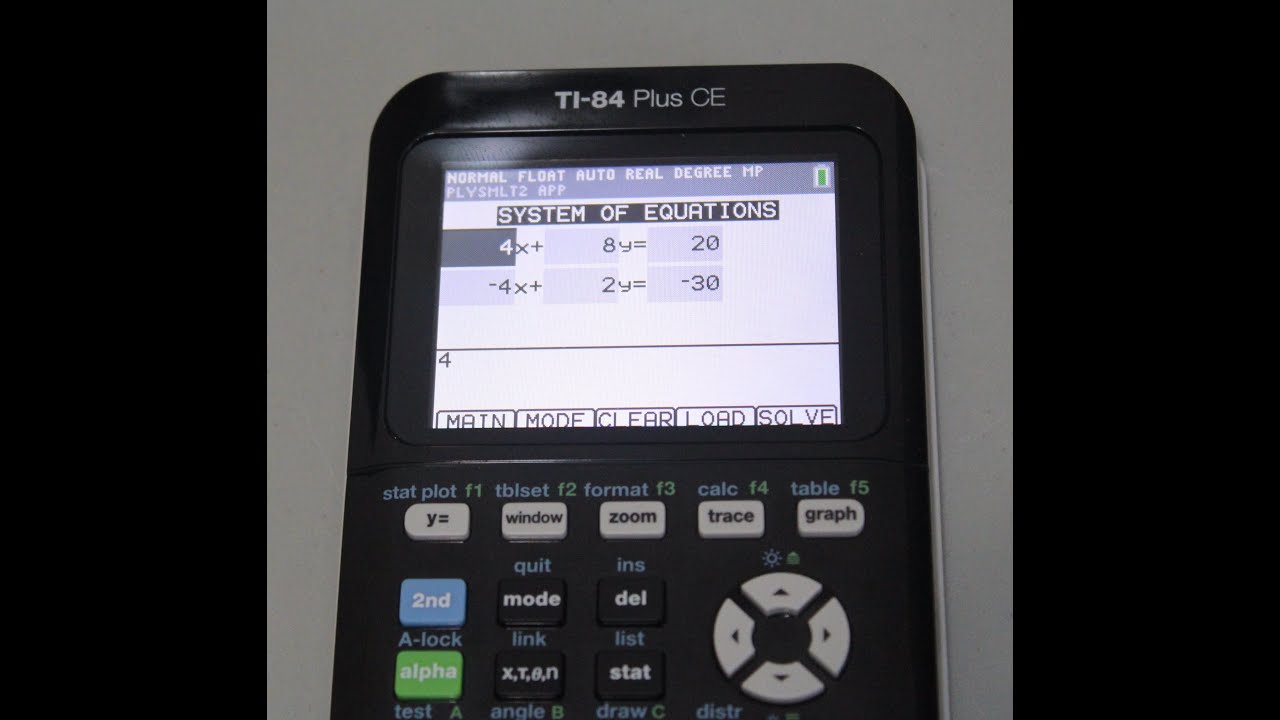
How to Solve Systems of Equations on TI-84 Plus CE and TI-84 Plus Silver Edition
Using Your TI-84 Plus CE Part 2: Basic Graphing

TI-84 Plus Graphing Calculator Guide: Statistics
TI 84 Plus CE Solving Quadratic Equations with the Polynomial Root Finder App
5.0 / 5 (0 votes)
Thanks for rating: