How to Make a Ceramic Teapot, from Beginning to End.
TLDRThis detailed video script outlines the intricate process of crafting teapots from clay to finished ceramic pieces. It begins with clay preparation, wedging, and throwing on the potter's wheel, followed by shaping, trimming, and assembling the teapot components. The script meticulously describes the steps of attaching the spout and handle, bisque firing, waxing, glazing, and final firing in a reduction kiln. The process concludes with post-firing clean-up, including grinding the lids smooth and washing the teapots. The video offers a rich insight into the pottery craft, highlighting the skill, patience, and precision required to create functional and aesthetically pleasing teapots.
Takeaways
- 🏺 The video details the entire process of crafting teapots from clay to finished pieces, including clay preparation, throwing, trimming, and firing.
- 👷♂️ The potter begins by wedging clay to remove air pockets and create a consistent mass, then weighs and wedges individual lumps for teapot bodies.
- 🔪 A wooden bat is attached to a clay pad on the wheel head to facilitate lifting the teapots without disturbing their shape.
- 🎯 The potter uses a throwing gauge to ensure consistent dimensions for each pot, aiming for precision in the crafting process.
- 🚶♂️ The process involves careful shaping of the teapot, including opening the form, creating the base, and forming the gallery for the lid.
- 📏 The opening of the teapot is measured with calipers to ensure that the lids will fit perfectly, with slight adjustments made if necessary.
- 🧽 The teapot components are cleaned and refined, with excess clay removed and surfaces smoothed in preparation for assembly.
- 🌿 The thrown components are allowed to dry to 'leather hard' before assembly, with care taken to monitor the drying process to prevent warping or cracking.
- 🔩 The assembly process involves attaching the lid, spout, and handle, with attention to detail to ensure a seamless and functional final product.
- 🔥 The teapots are first bisque fired to transform the clay into ceramic, then waxed and glazed before a final reduction firing for the desired color and finish.
- 🎨 The final step involves cleaning up the glaze, removing any excess or unwanted glaze from the finished teapots, and polishing them to a smooth finish.
Q & A
What is the first step in making a teapot according to the script?
-The first step is clay preparation, which involves wedging up a large lump of clay to remove air pockets and achieve a consistent mass.
How does the potter ensure the teapot's walls become thinner during the throwing process?
-The potter pinches the clay up from the bottom and lifts it up, moving their hands together at an even pace while maintaining the same amount of pressure, making the walls thinner with each pull.
What is the purpose of using a wooden bat during the teapot-making process?
-The wooden bat allows the potter to lift the teapots away from the wheel head without touching the actual form, helping to avoid deformation.
Why does the potter measure the opening of the teapot with calipers?
-Measuring the opening ensures that the lids can be thrown to the exact same dimensions, which is crucial for a perfect fit.
What is the term used to describe the stage when the thrown components need to dry?
-The stage is called 'leather hard', which occurs before the components can be assembled into a teapot.
How does the potter ensure a sharp edge for the spout's rim during the making of the teapot?
-The potter uses a sharp, curved metal kidney to carefully remove the outer layer of slip, refining the shape and achieving a sharp edge for the spout's rim.
What is the significance of the small hole pierced in the teapot lid?
-The small hole allows air to be pulled through the form when pouring tea, preventing the teapot from glugging and ensuring proper functioning.
How does the potter attach the handle to the teapot?
-The potter scores a small area on the teapot's body, adds a bit of water or slip, and then attaches the handle blank, blending the excess clay into the body to create a seamless and strong join.
What is the purpose of waxing the teapot before glazing?
-Waxing prevents certain areas of the teapot from absorbing water and glaze, ensuring that these areas remain unglazed, which is necessary for the proper functioning and appearance of the teapot.
What type of kiln is used for the final firing of the teapots?
-A reduction-fired kiln, specifically a Rhoda KG 340, which is fueled by gas, is used for the final firing to achieve the desired color and glossy finish.
How does the potter ensure the teapot and lid match in terms of color and finish during the final firing?
-The potter fires the teapot and lid together, suspended above each other, to ensure they are exposed to the same conditions and thus match in color and finish.
Outlines
🏺 Crafting Clay into Teapots
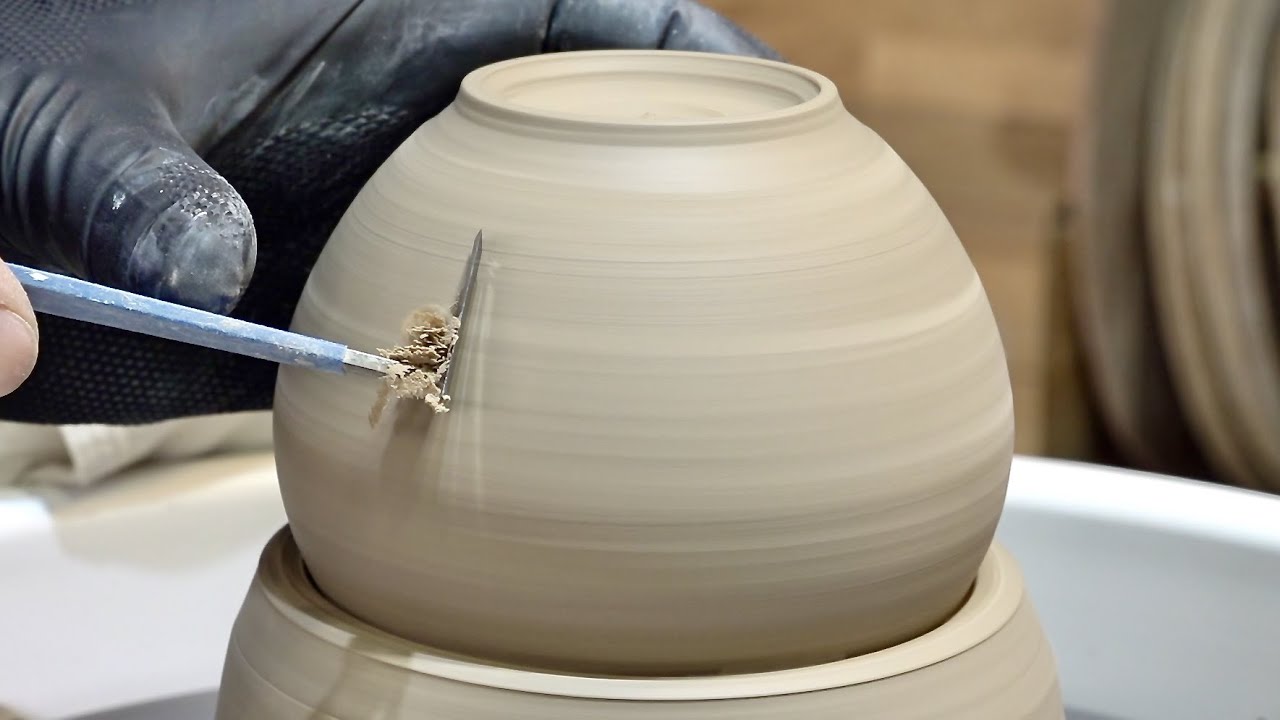
The paragraph describes the meticulous process of transforming soft clay into finished teapots. It begins with clay preparation, wedging, and weighing out individual lumps for each teapot body. The clay is kept wrapped to prevent excessive drying. The process continues with attaching a wooden bat for later removal, centering the clay, and forming the teapot's base and walls. The teapot is shaped, with attention to the gallery for the lid and ensuring the walls are thin enough. The opening is measured for precise lid fitting, and excess clay is removed for a clean finish. The teapot components are left to dry to a specific consistency before assembly.
🗑️ Shaping and Assembling Teapot Parts
This paragraph details the continuation of teapot construction, focusing on the creation of the lid and spout. The lid is formed from centered clay, with attention to the diameter for a perfect fit with the teapot body. The spout is crafted off the hump, a technique for creating multiple pieces from a larger clay mass. The shaping of the spout involves delicate insertion of a wooden dowel to create a narrow opening and refining the edge for a clean pour. The components are assembled once they reach the right stage of dryness, with careful handling to avoid damage.
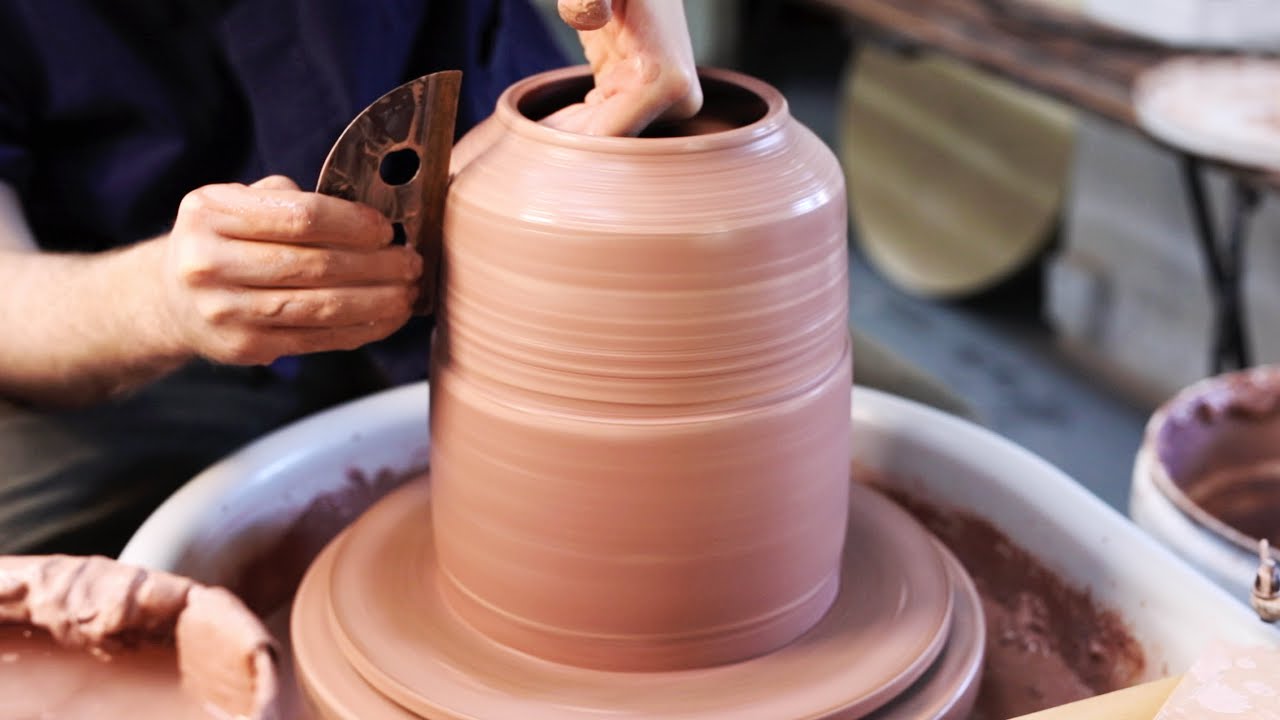
🔪 Trimming and Perfecting the Teapot
The paragraph outlines the intricate process of trimming the teapot components for a refined finish. The teapot body is trimmed layer by layer, with careful attention to refining the shape and reducing weight. The lid is also trimmed to ensure a snug fit, with a concave surface and a sharp outer edge for aesthetic and functional purposes. A small hole is pierced into the lid for proper tea pouring. The underside of the lid and the body of the teapot are cleaned up for a smooth finish, and the maker's mark is stamped onto the base.
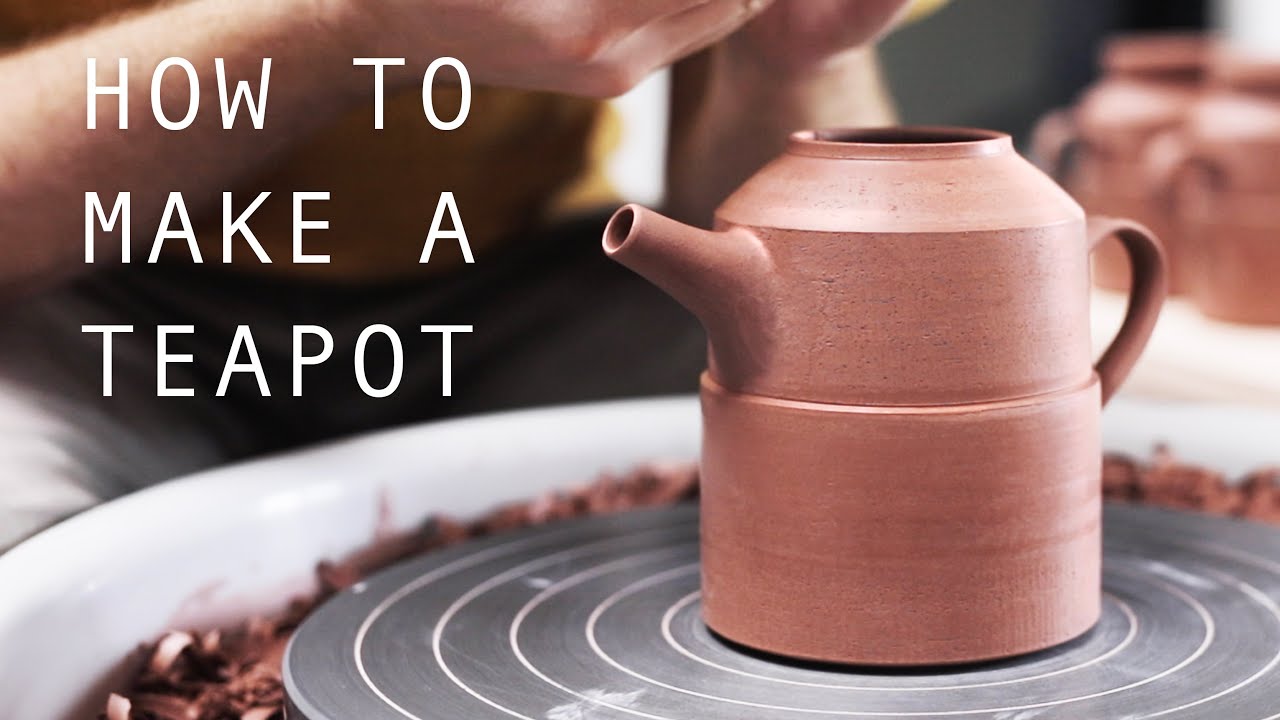
🔗 Attaching the Spout and Handle
This section describes the careful attachment of the spout and handle to the teapot. The spout is prepared with a sponge to smooth the interior walls and ensure proper drainage. Holes are carefully pierced and cleaned, with attention to the angle and positioning for seamless integration with the teapot. The handle is shaped from a long strip of clay, attached, and then pulled to create a loop. Both the spout and handle are blended into the teapot body for a seamless appearance, with slow and delicate work to avoid distortion.
🔥 Firing and Glazing the Teapots
The paragraph details the bisque firing process, where the teapots are transformed from clay to ceramic through a slow and controlled firing in an electric kiln. The teapots are carefully prepared for glazing, with wax applied to prevent glaze adhesion on certain areas. The glazing process involves dunking the teapots into a bucket of glaze, removing excess, and cleaning up any stray marks. The wax is not perfect and requires later cleaning, but the final gas reduction firing will burn it away.
🎨 Final Touches and Finishing the Teapots
The final stage of teapot creation is discussed here, focusing on the preparation for the final firing and the subsequent cleaning. The teapots are fitted with wadding to ensure even heating and color matching. The reduction firing process in a gas kiln transforms the clay and glazes, with careful monitoring of gas and air pressure to achieve the desired results. After cooling, the teapots are cleaned, with the removal of any remaining wax, sanding of the bases, and a final wash to ensure a smooth, glassy finish.
Mindmap
Keywords
💡Clay Preparation
💡Throwing Teapots
💡Trimming
💡Assembling Teapots
💡Bisque Firing
💡Glazing
💡Kiln Firing
💡Reduction Firing
💡Wax Resist
💡Pottery Tools
💡Pottery Techniques
Highlights
The entire process of making a small teapot from soft clay to a finished piece is detailed in this comprehensive video.
Clay preparation involves wedging up a large lump of clay to remove air pockets and achieve uniform consistency.
Individual lumps of clay are weighed and wedged, then wrapped in plastic to prevent excessive drying.
A wooden bat is attached to a pad of clay on the wheel head, allowing for easy removal of the teapot post-creation without touching its form.
The potter centers the lump of stoneware clay, ensuring it is well-centered by coneing it up and down.
The teapot form is opened using the thumb and index finger, creating the base and gradually thinning the walls to match a throwing gauge's pointer for consistent dimensions.
The teapot's shape is defined by pushing out the belly and collaring the top to form a sharp angle around the waist and create a gallery for the lid.
Calipers are used to measure the teapot's opening to ensure the lid fits perfectly, highlighting the importance of precision in pottery.
The teapot is cleaned up by removing excess slip and defining the shape further with a sharp metal kidney.
The teapot's rim is softened with a shammy leather, and the thrown components are left to dry to a 'leather hard' stage before assembly.
The lid is crafted with a thick rim and a locating flange, checked for fit with the teapot body, and then trimmed for a precise fit.
A small hole is pierced in the lid for air flow, which is crucial for the teapot's functionality and to prevent glugging during pouring.
The spout is thrown off the hump, carved to shape, and cleaned with a sharp curved metal kidney for a sharp rim.
Assembly of the teapot involves careful trimming, attaching the spout and handle, and ensuring a seamless integration of the components.
The teapot is bisque fired in an electric kiln, changing the clay into ceramic and making it stronger and more porous for glazing.
Glazing involves cleaning the inside of the teapot, dipping it into glaze, and cleaning up any stray drips for a neat finish.
The final firing is done in a gas reduction kiln, which changes the color of the iron oxide and glazes for a unique finish.
The process concludes with the removal of the kiln supports, smoothing the lids with carborundum paste, and a thorough cleaning of each piece.
Transcripts
Browse More Related Video
How to Make a Pottery Teapot from Start to Finish
Making a Large Stepped Lidded Jar — From Start to Finish

How a Handmade Pottery Cup is Made from Beginning to End — Narrated Version
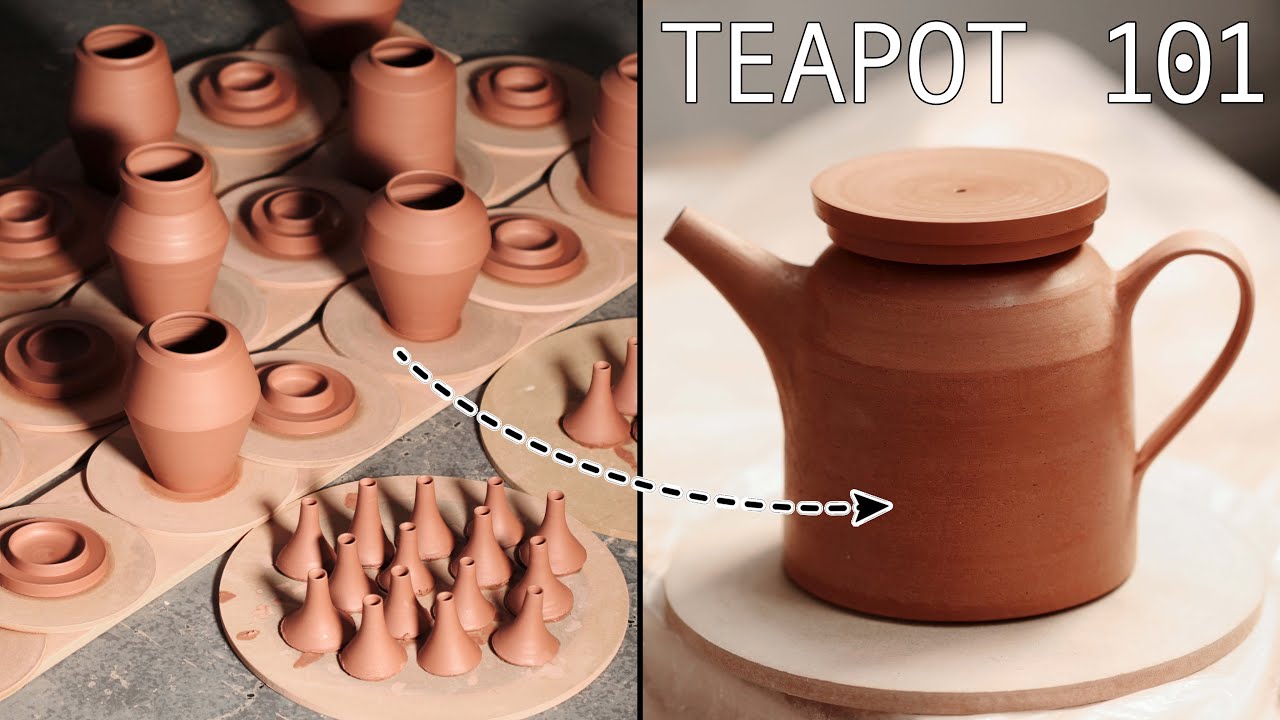
How to Make Teapots 101
How to Make Luxury Traditional Teapot by Delicate Korean Pottery Craftsman

How to Centre Clay and Throw Pots on the Pottery Wheel
5.0 / 5 (0 votes)
Thanks for rating: