Ray Diagrams - Lenses
TLDRIn this informative video, Mr. Andersen explains the principles of ray diagrams for converging and diverging lenses, using the analogy of a marching band to illustrate refraction. He discusses the concepts of focal points, the differences between real and virtual images, and provides a step-by-step guide on how to draw ray diagrams. The video also includes a simulation to demonstrate the concepts practically, encouraging viewers to understand and apply the principles in real-world scenarios or through experiments.
Takeaways
- 👓 Mr. Andersen discusses the use of lenses for correcting vision problems, such as near-sightedness and far-sightedness.
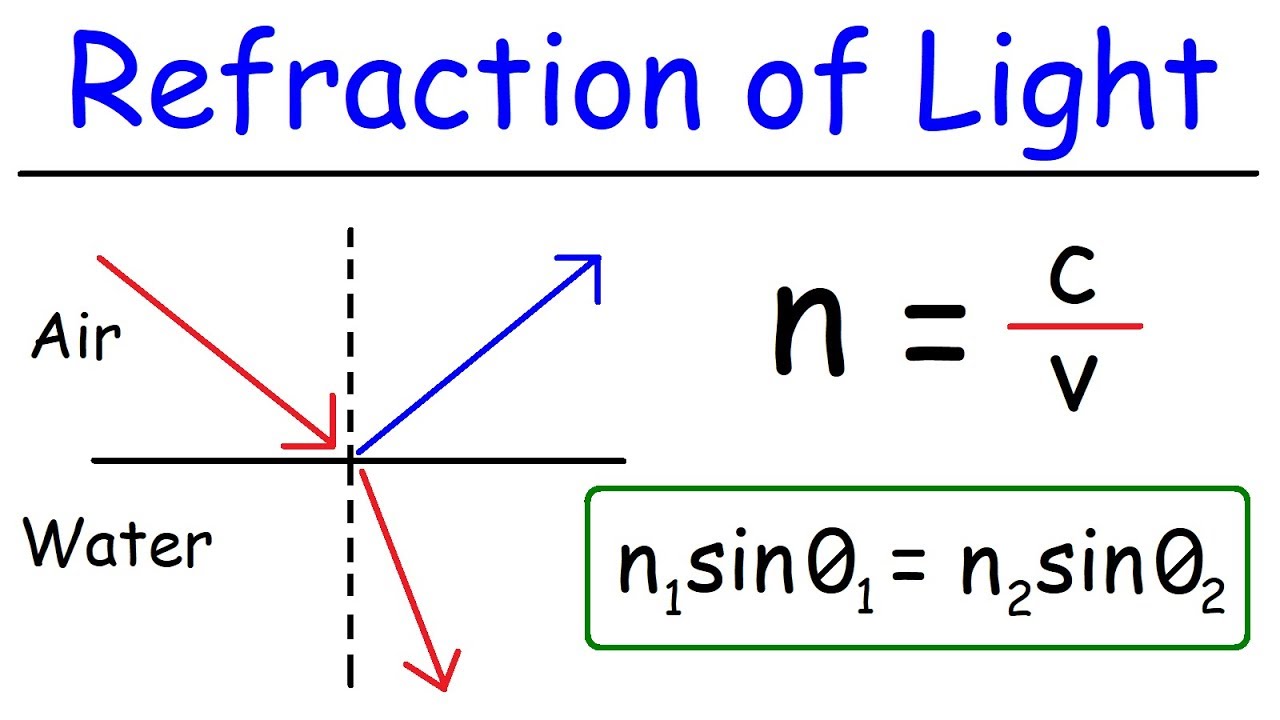
- 🌟 Understanding the concept of refraction is crucial for working with lenses, as it describes how light bends when moving between different media.
- 🔍 The difference between real and virtual images can be determined by whether a real image can be captured on a piece of paper.
- 💡 Converging lenses are used to correct far-sightedness by focusing light rays at the correct point on the retina.
- 🔎 Diverging lenses help correct near-sightedness by spreading light rays so that they focus on the retina properly.
- 📏 The focal point (f) and twice the focal point (2f) are important references for understanding lens behavior and image formation.
- 📐 Ray diagrams are a practical tool for visualizing and predicting where images will form with converging and diverging lenses.
- 🤔 When an object is within the focal point of a converging lens, the image formed is virtual, upright, and cannot be projected onto a screen.
- 🔄 For diverging lenses, the rays diverge after passing through, and the virtual image is formed on the same side as the object, upright and smaller.
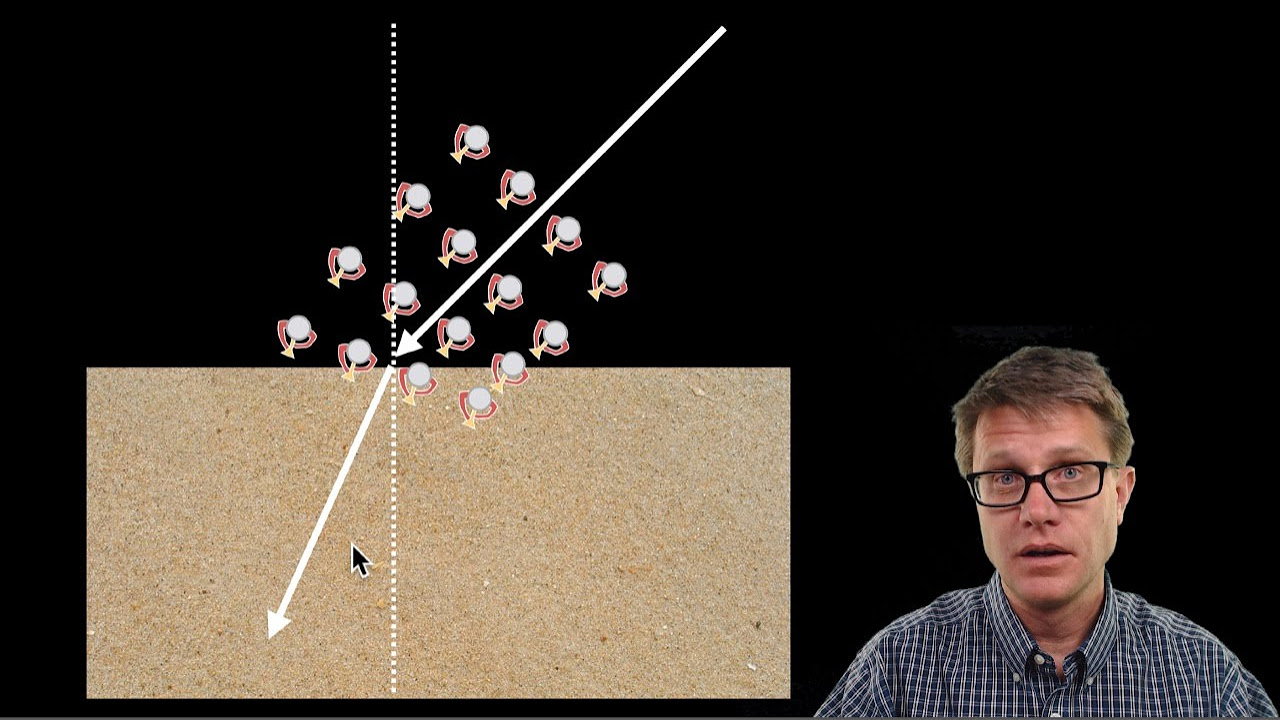
- 🧠 The concept of refraction is analogized with a marching band moving through different surfaces, illustrating how the speed change affects the direction of light.
- 🚀 Simulations and physical lenses can be used for practical data collection and to better understand image formation and lens behavior.
Q & A
What is the primary focus of Mr. Andersen's video?
-The primary focus of Mr. Andersen's video is to demonstrate how to draw ray diagrams for both converging and diverging lenses.
Why does Mr. Andersen wear lenses?
-Mr. Andersen wears lenses because he is near-sighted, and the converging lens in his eye focuses the image in front of his retina, causing everything to be out of focus.
What is the solution for someone who is far-sighted according to the video?
-For someone who is far-sighted, the solution is to use another converging lens to focus the image correctly on the retina.
What is refraction and how does it relate to lenses?
-Refraction is the bending of light as it moves from one medium to another. In the context of lenses, refraction occurs when light passes through the lens, causing it to change direction and focus.
How can you tell the difference between a real image and a virtual image?
-A real image can be captured on a piece of paper, while a virtual image cannot. A virtual image appears to be located behind the lens or mirror and does not actually exist at the location it appears to be.
What are the two types of lenses discussed in the video?
-The two types of lenses discussed in the video are converging lenses and diverging lenses.
How does the position of an object in relation to the focal point affect the image formed?
-If the object is outside the focal point, a real image is formed. If the object is inside the focal point, a virtual image is formed.
What is the significance of the focal point (f) and 2f in the context of lenses?
-The focal point (f) is the point where parallel light rays converge after passing through a lens. 2f, or twice the focal length, is a point where the light rays cross after passing through the lens, and it is also referred to as the center of curvature when dealing with mirrors.
How does the marching band analogy help explain refraction?
-The marching band analogy illustrates how light rays (trumpet players) slow down when they enter a different medium (sand), causing the rays to bend or refract. This analogy helps to visualize how refraction occurs when light passes through a lens at an angle.
What happens to the image when an object is moved inside the focal point of a converging lens?
-When an object is moved inside the focal point of a converging lens, the image becomes a virtual image on the same side as the object, and it is upright.
How does the size and orientation of the image change with a diverging lens?
-With a diverging lens, the virtual image is upright and smaller than the object. As the object approaches the focal point, the virtual image gets larger but remains upright and virtual in nature.
Outlines
👓 Understanding Lenses and Ray Diagrams
This paragraph introduces the concept of ray diagrams for converging and diverging lenses, using the personal experience of Mr. Andersen, who is near-sighted, to explain the need for corrective lenses. It discusses how converging lenses focus light in front of the retina for near-sighted individuals, while diverging lenses are used for far-sightedness to focus light properly. The paragraph also explains the phenomenon of refraction, the creation of real and virtual images, and how to differentiate between them using a piece of paper. The importance of understanding refraction is emphasized through a marching band analogy, which illustrates how light rays bend when they pass through different media, such as glass.
🔍 Applying Ray Diagrams to Lenses
In this paragraph, the process of drawing ray diagrams for both converging and diverging lenses is detailed. It explains the significance of the focal point (f) and twice the focal length (2f), and how these relate to the center of curvature in mirrors. The steps for drawing ray diagrams are outlined, including the treatment of parallel and central rays for each type of lens. The paragraph further discusses the characteristics of real and virtual images, their orientation (upside down for real and upright for virtual), and the practical application of these concepts through simulations and physical lenses. The paragraph concludes with a question to the viewer, encouraging them to apply their understanding of ray diagrams in practice.
Mindmap
Keywords
💡Ray diagrams
💡Converging lenses
💡Diverging lenses
💡Focal point (f)
💡2f (twice the focal length)
💡Refraction
💡Real image
💡Virtual image
💡Marching band analogy
💡Optical simulation
💡Data collection
Highlights
Mr. Andersen introduces the topic of drawing ray diagrams for converging and diverging lenses.
He shares a personal connection to lenses, being near-sighted and understanding the need for corrective lenses.
A diverging lens is used to correct near-sightedness by moving the focal point onto the retina.
A converging lens is used for far-sightedness to focus the image correctly on the retina.
The concept of refraction is explained as the bending of light when it moves from one medium to another.
The creation of real and virtual images by lenses is discussed, with a real image being one that can be captured on a screen.
Ray diagrams are introduced as a method to determine the location of the image formed by a lens.
A converging lens is described, with its focal point and 2f point being key elements in understanding image formation.
The process of drawing a ray diagram for a converging lens is detailed, including the paths of parallel and center rays.
The characteristics of a virtual image formed by a converging lens inside the focal point are explained.
A simulation is mentioned as a tool to visualize the effects of moving an object relative to the focal length of a lens.
The explanation shifts to diverging lenses, with a focus on their effect on light rays and the formation of virtual images.
The method for drawing a ray diagram for a diverging lens is outlined, emphasizing the divergence of light rays.
The virtual image formed by a diverging lens is described as being upright and smaller than the object.
The importance of understanding the behavior of light through converging and diverging lenses for practical applications is highlighted.
The video concludes with an encouragement to practice using simulations and lenses to plan data collection and understand image formation.
Transcripts


5.0 / 5 (0 votes)
Thanks for rating: