Math String Art (Measuring)
TLDRThe video script outlines a step-by-step guide to creating a math string art project. It begins with setting up a ruler and marking a center point on paper, followed by using a compass to draw an eight-inch circle. Key points are marked around the circle, and lines are drawn to form a central triangle and a star pattern. The process emphasizes accuracy for a neat outcome. A six-inch circle is then added, and the points of the triangles are connected. The star's points are marked with 1/8-inch intervals, and lines are drawn across the six-inch circle. Finally, a push pin is used to secure the pattern onto a stack of paper, ready for stringing. The tutorial stresses the importance of precision for the final art piece's quality.
Takeaways
- 📏 **Ruler Placement**: Start by placing a ruler at each corner of the paper to ensure two points of contact, preventing it from moving.
- ✂️ **Marking the Center**: Make a small 'X' on the paper to mark the center, which will be the reference point for the project.
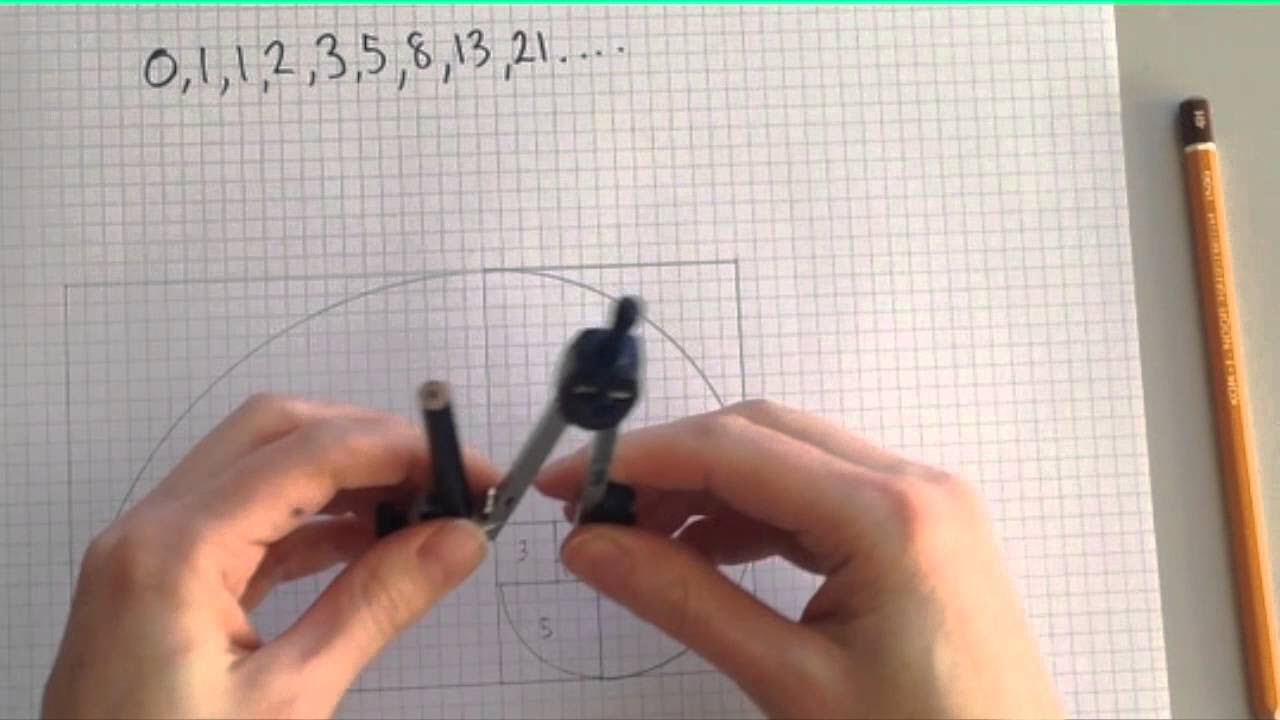
- 📐 **Drawing the Circle**: Use a compass set to four inches to draw an eight-inch circle around the 'X' mark.
- 🔄 **Circle Marking**: Make a small slash on the circle and use the compass to mark the circle at the four-inch radius all around until you return to the starting point.
- 🔢 **Numbering Points**: Number the points around the circle starting from one to six to establish the positions for the star pattern.
- 🌟 **Connecting Points**: Connect the numbered points to form a triangle (1-3, 3-5, 1-5) and then a star (2-4, 4-6, 6-2) within the circle.
- 📐 **Second Circle**: Draw a six-inch circle using a compass set to three inches for additional pattern details.
- 📐 **Triangle Connection**: Connect the points of the triangles (2-5, 3-6, 4-1) using the ruler to maintain accuracy.
- 📏 **Star Marking**: Mark 1/8-inch intervals on the star's perimeter starting from the points towards the inside corner.
- 📏 **Cross Marking**: Measure and mark 1/8-inch intervals across the six-inch circle, ensuring accuracy for thread placement.
- 📌 **Pin Marking**: Use a push pin to mark the 1/8-inch intervals on the paper, first around the star's perimeter, then on the inner lines.
Q & A
What is the first step in preparing for math string art?
-The first step is to place a ruler on each corner of the paper, ensuring two points of contact to keep it from moving, and then mark a small X in the middle of the paper to establish the center.
How do you determine the size of the initial circle for the string art?
-You use a compass set to four inches to draw an eight-inch circle, with the point of the compass placed on the X mark in the center of the paper.
What is the purpose of making a slash mark on the circle?
-The slash mark serves as a starting point for marking around the circle with the compass at a four-inch radius, creating equally spaced marks around the circle.
How many points should you mark on the circle before connecting them?
-You should mark six points on the circle, corresponding to the numbers one through six.
What shape is formed in the center of the circle after connecting certain points?
-Connecting the points one to three, three to five, and one to five forms a triangle in the center of the circle.
How is the star pattern created in the string art?
-The star pattern is created by connecting points two and four, four and six, and two and six, forming a star shape which is the basic pattern for the project.
Why is it important to draw the template neatly?
-A neatly drawn template is crucial because it determines the accuracy and final outcome of the string art project.
What is the radius of the second circle drawn in the string art process?
-The radius of the second circle is three inches, as the compass is set to this measurement.
How do you ensure the ruler doesn't move when connecting points on the paper?
-You should ensure there are two points of contact on the ruler to prevent it from moving while you draw the connecting lines.
What tool is used to mark the 1/8 inch intervals on the paper?
-A push pin is used to mark the 1/8 inch intervals by pushing it through the paper onto a stack of paper or a ream of paper underneath.
How should the 1/8 inch marks be spaced when connecting the points of the star?
-The 1/8 inch marks should be spaced accurately and consistently all the way around the perimeter and across the lines of the star to ensure proper thread placement later.
What precaution should be taken when using a push pin to mark the paper?
-A stack of paper or a ream of paper should be placed underneath the diagram to prevent the push pin from damaging the desk or other underlying surfaces.
Outlines
📏 Setting Up the Math String Art Template
The first step in preparing for math string art involves using a ruler and a compass to create a precise geometric pattern. Start by marking the center of the paper with two small X's and then draw an eight-inch circle using a compass set to four inches from one of the X's. Next, mark points around the circle at a four-inch radius, ensuring accuracy with the compass. After marking six points, connect them to form a star pattern within the circle, which will serve as the basis for the project. The process emphasizes the importance of a neat and accurate drawing to ensure the final art piece's quality.
📏 Marking and Piercing the String Art Pattern
Following the initial setup, the next phase involves marking the star pattern with 1/8-inch intervals using a ruler. This meticulous process requires marking all around the star's perimeter and across the connecting lines of the six-inch circle, which is drawn with a compass set to three inches. Accuracy is key as these marks will dictate the positioning of the thread in the final piece. To prevent damage to the desk and ensure the marks are made on the diagram, a push pin is used to pierce the paper at each 1/8-inch mark, both around the star's perimeter and on the internal lines.
Mindmap
Keywords
💡Math String Art Prep
💡Ruler
💡Compass
💡Circle
💡Center
💡Slash Mark
💡Star Pattern
💡Push Pin
💡1/8 Inch Marks
💡Accuracy
💡Template
Highlights
Starting the math string art prep by placing the ruler on each corner of the paper and ensuring two points of contact to prevent movement.
Marking a small X in the middle of the paper to establish the center for the project.
Using a compass set to four inches to draw an eight-inch circle around the central X.
Making a slash mark on the circle and using the compass to mark the circle with a four-inch radius at regular intervals.
Creating a series of numbers around the circle to serve as connection points for the string art pattern.
Connecting the numbers one, three, and five to form a triangle in the center of the circle.
Linking the remaining numbers two, four, and six to form a star shape, which is the basic pattern for the project.
Emphasizing the importance of accurately drawing the template for the success of the final art piece.
Drawing a six-inch circle using a compass set to three inches for a secondary pattern layer.
Connecting the points of the triangles to complete the star pattern within the circles.
Using a ruler to mark 1/8-inch intervals towards the inside corner of the star points.
Focusing on the lines connecting the star points and marking 1/8-inch intervals across the six-inch circle.
Stressing the need for accuracy in marking the intervals to ensure proper thread placement later on.
Using a push pin to secure the pattern onto a stack of paper or a ream without damaging the desk.
Pushing the push pin onto the 1/8-inch marks around the perimeter of the star and then on the internal lines.
The meticulous process of creating the string art pattern to ensure that it is neat and precise.
The final result should be a well-crafted star pattern within two concentric circles.
The entire process requires patience and precision to achieve a high-quality string art outcome.
Transcripts
Browse More Related Video


5.0 / 5 (0 votes)
Thanks for rating: