Hu-Friedy's It's About Time Sharpening [FULL]
TLDRThe video script provides an in-depth guide on sharpening dental instruments, specifically scalars and curettes, using the 'It's About Time' method developed by Sherry Burns. The technique leverages visual imagery of a clock face for proper instrument and stone alignment, ensuring a consistently sharp edge while preserving the blade's original shape. The importance of using sharp instruments for efficient deposit removal and the selection of appropriate sharpening stones, such as Arkansas, India, and ceramic stones, are emphasized. The script also details the sharpening process for different types of curettes, including sickle scalers and universal curettes, and addresses common sharpening difficulties. It concludes by highlighting the clinical benefits of using well-sharpened instruments and the necessity of regular sharpening practice for skill development.
Takeaways
- ⏰ **Timely Sharpening**: Sharpening dental instruments like scalars and curettes is crucial to maintain their effectiveness and efficiency in removing dental deposits.
- 📏 **Restoration of Edge**: The primary goal of sharpening is to restore a sharp cutting edge while preserving the original shape of the blade.
- 🤲 **Hand Technique**: Utilizing the hands of the clock as a visual guide helps in aligning the instrument and sharpening stone correctly for consistent sharpening results.
- 🔍 **Visual Inspection**: Before and after sharpening, the condition of the instrument blade should be evaluated using visual inspection or the glare test and a plastic test stick.
- ⚖️ **Sharpness Assessment**: A sharp blade will grab or bite the plastic test stick, indicating its readiness for use, whereas a dull blade will slide over the surface.
- 🛠️ **Sharpening Stones**: Selecting the proper stone for the task is essential, with different types like Arkansas, India, and ceramic stones available for various sharpening needs.
- 💧 **Lubrication**: Using mineral oil or water as a lubricant on the sharpening stone reduces friction and helps in the removal of metal shavings, maintaining the stone's quality.
- 🧽 **Maintenance of Stones**: Regular cleaning of sharpening stones with gauze and periodic removal of sludge or metal filings is necessary to maintain their effectiveness.
- 📐 **Instrument Design**: Understanding the design of the instrument, including the functional and terminal shank, is vital for proper sharpening and maintaining the correct angles.
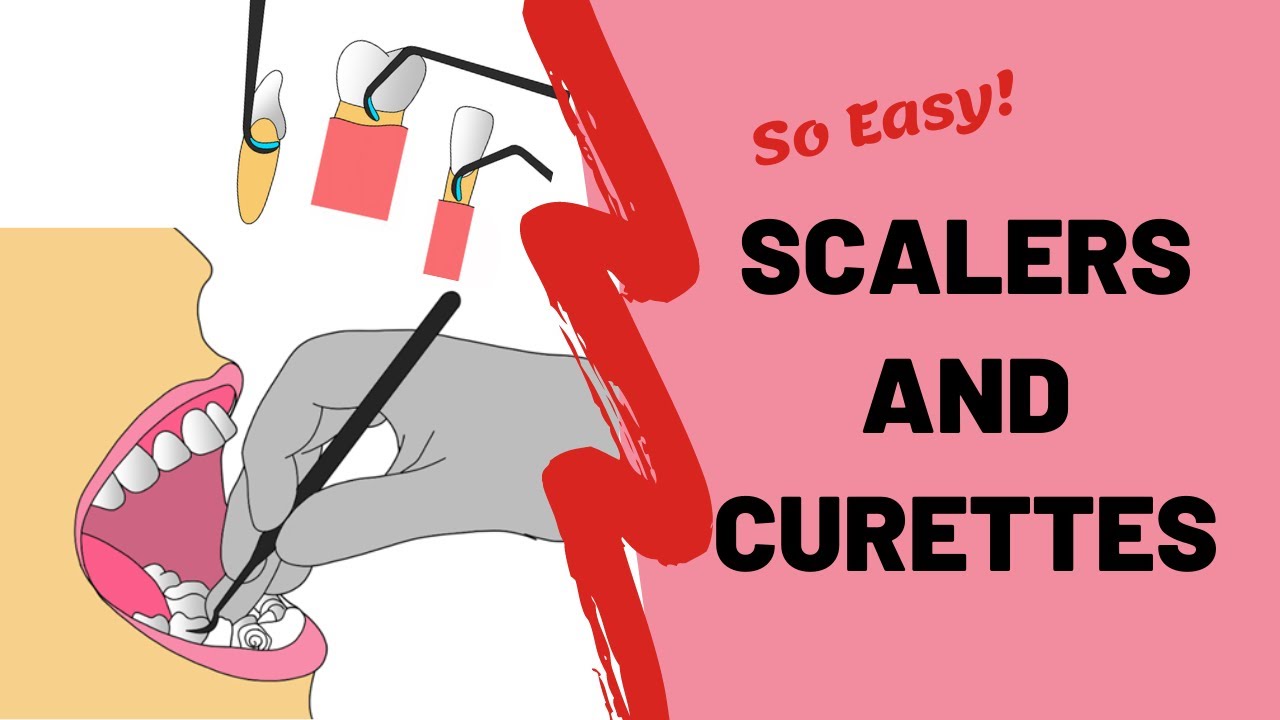
- 👁️ **Visual Imagery**: Employing visual imagery, such as the clock face, facilitates the correct positioning and sharpening technique for both scalars and curettes.
- 🛠️ **Sharpening Process**: The sharpening process involves a fluid up-and-down motion, starting from the heel to the middle and finally the tip of the blade, with long strokes and moderate pressure.
Q & A
What is the main purpose of sharpening dental instruments like scalars and curettes?
-The main purpose of sharpening dental instruments is to restore a sharp cutting edge to the instrument blade while preserving the original shape of the blade, which allows for more effective deposit removal with less pressure and fewer strokes.
What are the clinical benefits of using sharp dental instruments?
-Clinical benefits of using sharp dental instruments include improved calculus removal, reduced fatigue for the clinician, improved tactile sensitivity, minimized patient discomfort, and improved instrument function.
What are the three categories of sharpening stones mentioned in the script?
-The three categories of sharpening stones mentioned are Arkansas stones, India stones, and ceramic stones.
Why is it necessary to use mineral grade oil when sharpening with an Arkansas stone?
-Mineral grade oil is used with Arkansas stones to lubricate the stone and help float away metal shavings, preventing the shavings from becoming embedded in the stone, which ensures that the abrasive quality of the stone is retained.
How does the shape of the Arkansas stone affect its use in sharpening?
-The Arkansas stone is available in various shapes such as flat wedge, cylindrical, and conical, which can influence its use depending on the specific sharpening task and the shape of the dental instrument being sharpened.
What is the significance of the terminal shank in sharpening dental instruments?
-The terminal shank is the area of the instrument between the blade and the first bend of the shank. It is crucial during sharpening procedures as it must be properly aligned during instrument sharpening to maintain the correct angles and ensure the blade's original design is preserved.
How should the sharpening stone be held during the sharpening process?
-The stone should be grasped on the lower half with the thumb on the edge towards the user and fingers on the edge away from the user. This stabilizes the stone and assists in maintaining a consistent vertical motion during sharpening.
What is the visual imagery technique used to establish the correct positions for sharpening?
-The technique utilizes the face of a clock to establish the correct positions for sharpening a stationary instrument with a moving stone, using the hands of the clock for guidance.
How can one assess the sharpness of a dental instrument blade?
-One can assess the sharpness of a dental instrument blade through visual inspection or glare test and by using a plastic test stick. A sharp blade will grab or bite the surface of the plastic test stick, producing a metallic clicking sound.
What is the recommended procedure for sharpening the blade of a sickle scaler?
-When sharpening a sickle scaler, the entire length of the blade, including the heel, middle, and toe, should be sharpened. The stone is moved along the blade edge from the heel to the middle and finally to the toe of the blade, using a fluid up-and-down motion with long strokes and moderate pressure.
How does sharpening a Gracey curette differ from sharpening a sickle scaler or a universal curette?
-Gracey curettes have a facial surface that slants downward at a 70-degree angle, creating only one functional edge to be sharpened. The blade is straight and not curved, so the stone should not be rotated as when sharpening a sickle scaler or a universal curette. Instead, the blade should be sharpened in a straight line from heel to toe to preserve the original blade design.
Outlines
🗣️ Introduction to Sharpening Dental Instruments
The first paragraph introduces the 'It's About Time' method, developed by Sherry Burns, for sharpening dental instruments like scalars and curettes. It emphasizes the importance of maintaining a sharp cutting edge on instruments to ensure effective deposit removal with less pressure and fewer strokes. The method uses visual imagery related to the hands of a clock to guide the sharpening process. The paragraph also discusses the reasons for sharpening, the consequences of using dull instruments, and the types of sharpening stones, including Arkansas, India, and ceramic stones, along with their specific uses and maintenance.
📚 Sharpening Basics and Instrument Assessment
This paragraph delves into the fundamentals of sharpening, including the importance of understanding instrument design, grasp, and the assessment of an instrument's sharpness. It outlines the parts of a dental instrument and the significance of the terminal shank in the sharpening process. The paragraph also explains the correct way to hold the instrument and the sharpening stone, and the setup required for sharpening, such as a flat work surface, proper lighting, and necessary supplies. It concludes with a discussion on how to assess the sharpness of an instrument before and after sharpening using visual inspection and a plastic test stick.
🔪 Sharpening Sickle Scalers
The third paragraph focuses on the sharpening process for sickle scalers, which have two cutting edges that meet at a sharp point. It details the sharpening technique, which involves using a sharpening stone against the lateral surface of the blade, and cautions against sharpening the facial surface to prevent weakening the blade. The paragraph provides a step-by-step guide on how to sharpen the entire length of the blade, from heel to toe, using the clock as a guide for positioning. It also mentions the use of a cylindrical stone to finish the sharpening process and the importance of testing the sharpness of the instrument.
⚙️ Sharpening Universal Curettes
This paragraph describes the sharpening process for Universal curettes, which have two parallel cutting edges and a rounded toe. It emphasizes the importance of maintaining the 90-degree angle between the facial surface of the blade and the terminal shank. The sharpening technique involves using a lubricated stone against the blade's lateral surfaces, and the paragraph provides detailed instructions on how to hold the instrument and stone, as well as how to perform the sharpening strokes. It also discusses how to maintain the rounded shape of the curette toe and finish the sharpening process, including testing the sharpness with a plastic test stick.
🛠️ Sharpening Gracey Curettes
The fifth paragraph provides a guide for sharpening Gracey curettes, which differ from other types by having a single functional edge due to the downward slant of the facial surface. It explains the sharpening process, noting that the blade is straight and should not be rotated during sharpening. The paragraph outlines the correct positioning of the instrument and stone, the motion for sharpening, and how to round the toe of the curette. It also details the testing procedure for sharpness, emphasizing the correct use of the plastic test stick to avoid dulling the blade.
📈 Tips for Effective Sharpening
The final paragraph offers tips for effective sharpening, highlighting the importance of practice in developing the skill. It warns against common errors such as dragging the blade along the test stick and emphasizes the need for a secure palm grasp to counterbalance the pressure from the sharpening stone. The paragraph also stresses the importance of using the correct type of stone for the sharpening task and concludes by encouraging frequent sharpening to enjoy the clinical benefits of using well-maintained instruments.
Mindmap
Keywords
💡Sharpening
💡Sickles and Curettes
💡Sharpening Stones
💡Visual Imagery of the Clock
💡Instrument Sharpness Assessment
💡Gracie Curettes
💡Sharpening Difficulties
💡Clinical Benefits
💡Sharpening Technique
💡Instrument Design
💡Sharpening Basics
Highlights
The 'It's About Time' method is a classic technique for sharpening dental instruments, developed by Sherry Burns.
The method uses a visual imagery of the hands of the clock to establish correct sharpening positions.
Sharpening dental instruments restores a sharp cutting edge while preserving the blade's original shape.
Sharp instruments are more effective for deposit removal and require less lateral pressure and fewer strokes.
Dull instruments can lead to inefficient deposit removal and increased clinician fatigue.
Sharpening stones are crucial for restoring cutting edges, with different types like Arkansas, India, and ceramic stones available.
Arkansas stones are natural with a fine grit and require mineral oil lubrication.
India stones are synthetic and available in various grits, used for reconditioning worn instruments.
Ceramic stones are the newest type, available in single or dual grit, and do not require oil lubrication.
Proper care of sharpening stones is essential, including cleaning and sterilization after use.
Instrument design, grasp, and sharpening work area setup are fundamental to the sharpening process.
Visual inspection and the plastic test stick are methods to assess instrument sharpness before and after sharpening.
Sickle scalers have two cutting edges formed by the junction of the blade's facial surface with the lateral surfaces.
Universal curettes have two parallel cutting edges meeting at a rounded toe, with a semicircle blade shape in cross-section.
Gracie curettes differ with a single functional edge due to the facial surface slanting at a 70-degree angle.
Sharpening should be done with a secure palm grasp and without rotating the stone for Gracey curettes to preserve blade design.
Common sharpening difficulties include incorrect pressure application and improper use of the sharpening stone.
Frequent sharpening helps develop expertise and ensures instruments remain in top-notch condition for clinical benefits.
Transcripts


5.0 / 5 (0 votes)
Thanks for rating: